I had promised someone that I will make a tutorial section regarding breaking apart.So, here it is.
In this tutorial, you will learn how to creating a breaking apart photo from an object like this:
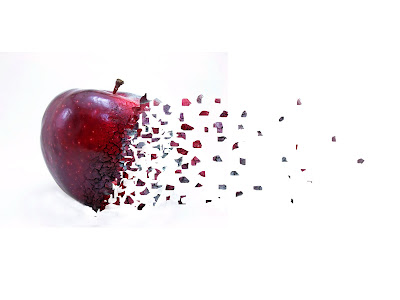
I not do tutorial with my own picture like what I did last time because I might take a bit longer and complicated to do.
Just make things simple, lets do it with an apple in this tutorial.
Don worry, the process is exactly the same way as how I did my breaking apart picture last time.
If you can't see the image clear enough in my blog, just click on the image for enlarge.
So....
Lets started!!

1) creating a photoshop file with the size and background colour you want.
2) open your image in that file. Of course, you need to have an object in your image. (like my apple)

3) now, click on
Lasso Tool in your photoshop tools panel.
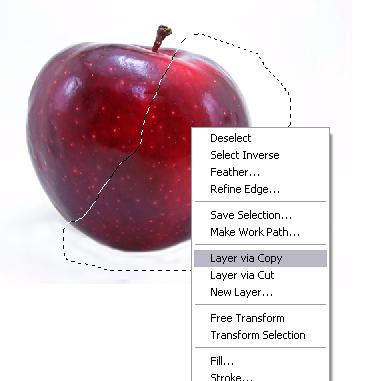
4) select the area that you wanna crack it. (make sure layer1 selected)
5)
right click on it > press
Layer via Copy

6) photoshop will copy the selected area to a new layer(layer2 in my tutorial)
7) in order the see the new layer with hiding others, you need to click on the eye button that is beside layer1 and background for hiding them.

8) choose
Quick Selection Tool in your tool panel.

9)
click and drag on those area that we don't need it. (Don't worry if the area your selected is a little too much because people won't notice it once it is breaking into pieces)

10) choose
lasso tool from your tools panel like what we did in step 3.
11) simply selecting a small piece from your object texture with lasso tool.

12)
press and hold down CTRL button, you will see a scissor on your mouse cursor (when pointing to the area you selected). now,
click and drag the selected texture away from your object. (make sure you move it with holding CTRL button)

13) keep doing the same task like step 12 until you see the result you want. It might take you a long time to do this.

14) now, you might wanna visible your layer1 and background by click on the eye again.
15) make sure your layer1 is selected.(just click on the layer for selecting it)
16) click on
Add vector mask. (you can find it on bottom of layer panel)

17) select
Brush Tool from tools panel.

18) make sure your brush is in
black colour. (you can change colour on bottom of tools panel)

19) I am highly recommend for you to use a soft brush with 0% of hardness. (you can still use hard brush if you want)

20) brushing out those area that you think it is not necessary to appear in your photo. (make sure
MASK of layer1 is selected)

21) after brushing, you might get a result like this.
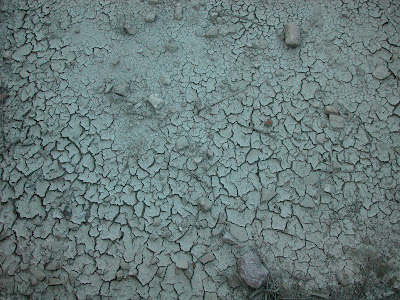
22) now, you need a texture which looks something like this. If you can't found any from others website, you can save a copy from the image above. I don't really mind :)

23) open this texture on your file with a new layer.

24) click on the drop down list above the layer panel, select
Overlay

25) go to
Edit >
Free transform

26) scaling the image to the size that you think is fine and press enter.

27) by layer3 selected, creating a
new mask. (as what we did on step 16)
28) select
Brush Tool from tools panel. you got to make sure it is soft brush now, and fill with black colour.(as what we did on step 17-19)
29) brush away those part that you think it is not real and unnecessary.(make sure MASK of layer3 selected)

30) after brushing, your image might looks similar like this.

31) if you think layer3 isn't looks clear enough, click and drag your layer3 to
create a new layer button and release it. (create a new layer button can found in bottom of layer panel)
photoshop will automatically copy a same layer from layer3.
-Done-
If you got any question about this tutorial, do ask me in comment section or email me.
I never did any tutorial guide before and this is the first one i did,
I hope you like it.
If you think I'm not doing well in this tutorial, do let me know as well.
Thanks!!!


